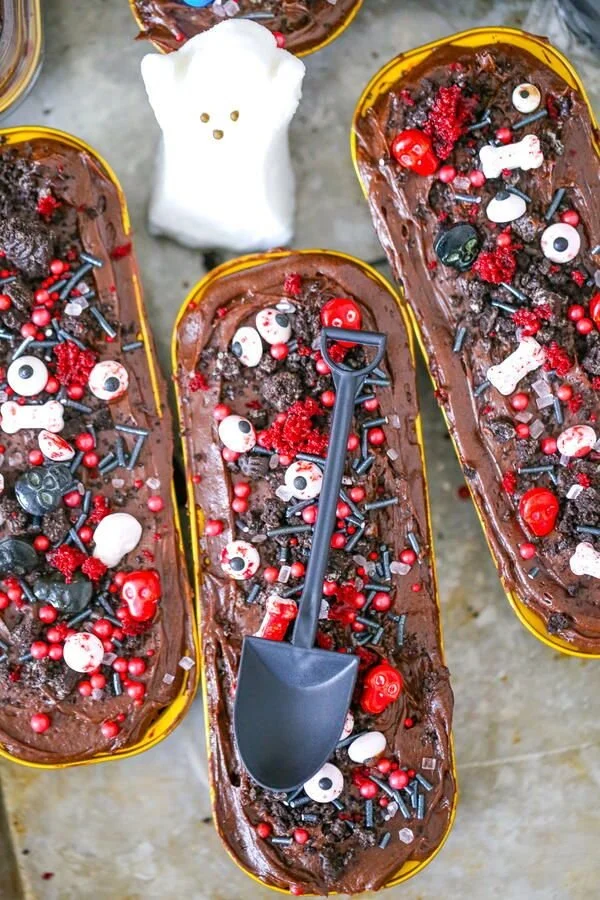
Graveyard Mini Dirt Cakes are the perfect blend of spooky and sweet, making them an irresistible treat for Halloween gatherings. These fun, layered desserts combine creamy chocolate pudding, crushed cookies, and festive decorations that bring a bit of playful flair to your celebrations. With straightforward steps, you can whip up these delicious mini cakes in no time, making them an ideal project for families or anyone wanting to add some spooky charm to their dessert table.
Why You’ll Love Graveyard Mini Dirt Cakes
- Easy to Prepare: The simple steps ensure that even novice bakers can easily assemble these treats without any fuss.
- Fun for All Ages: Kids will love helping to layer the ingredients and decorate with gummy worms and other treats, making this a perfect activity for family cooking.
- Customizable Decorations: You can personalize each dessert with different Halloween-themed decorations to suit your style or party theme.
- No Baking Required: This recipe requires no oven time, making it a great option for warm days or when you want a quick dessert.
- Perfect for Parties: These mini cakes are visually appealing and fun, making them a hit at Halloween parties or school functions.
Recipe Overview
- Prep Time: 20 minutes
- Cook Time: None
- Total Time: 20 minutes
- Servings: 6
- Difficulty Level: Easy
Ingredients You’ll Need for Graveyard Mini Dirt Cakes
- Pudding Layer:
- 1 package chocolate pudding mix
- 2 cups milk
- Cookie Layer:
- 1 package chocolate sandwich cookies (such as Oreos)
- Decorations:
- Gummy worms
- Halloween-themed decorations (such as candy or tombstone candies)
- Whipped cream (optional)
Note: You can use any chocolate pudding mix and your favorite chocolate cookie for this recipe. For a lighter version, consider using a low-fat milk or a dairy-free alternative.

How to Make Graveyard Mini Dirt Cakes
-
Prepare the Pudding: Start by mixing the chocolate pudding mix with 2 cups of milk according to the package instructions. Whisk until well combined. Set it in the fridge for about 5-10 minutes until it starts to thicken.
-
Crush the Cookies: While the pudding thickens, take the chocolate sandwich cookies and crush them into crumbs. You can place them in a zip-top bag and use a rolling pin, or pulse them in a food processor for a finer texture.
-
Layer the Desserts: Once the pudding has set, it’s time to layer your mini desserts. In cups or small bowls, start with a layer of the chocolate pudding, followed by a layer of cookie crumbs. Repeat the layering process until you reach the top of the cups.
-
Decorate: Top each mini cake with gummy worms and your chosen Halloween decorations. Get creative! You can use candy tombstones, sprinkles, or anything that fits the spooky theme.
-
Add Whipped Cream: For an extra touch, add a dollop of whipped cream on top before serving if desired.
-
Serve and Enjoy: Make sure to serve these chilled, letting the flavors meld together for that ideal dessert experience.
Tips for Success
- Use Cold Milk: Make sure your milk is cold when preparing the pudding mix; it helps the pudding set faster and achieve a smooth texture.
- Avoid Overmixing: When blending the pudding, mix just until combined to prevent excess air and ensure a creamy finish.
- Even Crumbs: Crush the cookies into even crumbs for consistent layering; larger chunks can affect the texture.
- Chill Before Serving: Chill the assembled dirt cakes for at least 30 minutes before serving for the best flavor and texture.
- Smaller Servings for Kids: Consider using smaller cups or ramekins for children’s portions to make them manageable.
Easy Variations
- Dairy-Free Option: Substitute the pudding mix and milk with dairy-free alternatives for a suitable dessert for lactose intolerant guests.
- Flavor Twist: Use vanilla pudding mix instead of chocolate for a completely different flavor profile.
- Add Fruit: Layer in sliced bananas or strawberries between the pudding and cookie layers for a fruity touch.
- Nutty Crunch: Incorporate crushed nuts or granola between the layers for added texture and flavor.
- Themed Variations: Switch out gummy worms for other themed candies, such as chocolate bats or ghosts, based on your party theme.
What to Serve with Graveyard Mini Dirt Cakes
- Halloween Punch: A fun fruit punch with floating gummy worms complements the dessert beautifully.
- Fruit Platter: Offer fresh fruit alongside the mini cakes for a refreshing contrast to the sweetness.
- Savory Snacks: Pair these desserts with salty snacks like popcorn or pretzels to balance out the flavors.
- Mini Sandwiches: Small finger sandwiches or wraps can provide a hearty base alongside the sweet treats.
Storage and Reheating
- Refrigerator Storage: Keep any leftover dirt cakes in the refrigerator for up to 3 days. Cover them to maintain freshness.
- Freezer Storage: While it’s best served fresh, you can freeze the pudding mixture for up to 2 months. Just layer it fresh when you’re ready to serve.
- Reheating Method: These mini cakes are best enjoyed chilled and do not require reheating.
- Preserving Texture: To maintain the cookie crumb texture, avoid layering them too far in advance; they can become soggy.
Common Mistakes to Avoid
- Under or Over Whisking the Pudding: Whisk just until combined; both over-mixing and under-mixing can affect the texture.
- Wrong Cookie Consistency: Ensure the cookies are crushed evenly to achieve a great layering effect; large chunks can cause difficulty in serving.
- Not Chilling Long Enough: Skipping the chilling step can lead to runny pudding and lose the intended texture.
Graveyard Mini Dirt Cakes: Background & Cultural Inspiration
Graveyard Mini Dirt Cakes draw inspiration from the traditional ideas of Halloween, celebrating the spooky and whimsical sides of the holiday. This dessert embodies the playful spirit of Halloween while highlighting the fun of creating treats that appeal to both children and adults. The concept of dirt cakes originates from the classic “dirt cups” often made with chocolate pudding and cookie crumbles, evolving to include themed decorations that make it perfect for festive gatherings. Embracing a light-hearted yet eerie aesthetic, these mini dirt cakes have become a staple at Halloween parties, providing a fun, interactive dessert experience.
Frequently Asked Questions
Can I make these dirt cakes ahead of time?
Yes, you can prepare the pudding and chocolate cookie layers ahead of time. Assemble the dirt cakes a few hours before serving or the night before for the best results.
Can I use vanilla pudding instead of chocolate?
Absolutely! You can customize your dirt cakes by using vanilla pudding and pairing it with different toppings for a unique twist.
How long do leftovers last?
Leftover dirt cakes can be stored in the refrigerator for up to 3 days. Make sure to cover them to keep them fresh.
Can I use different cookies apart from chocolate sandwich cookies?
Yes, you can experiment with various cookie types, such as vanilla wafers or peanut butter cookies, for different flavors and textures.
What are some alternative decorations I can use?
Beyond gummy worms, you can use crushed candy bars, chocolate eyeballs, or edible Halloween decorations to create a unique look.
Final Thoughts
Graveyard Mini Dirt Cakes are not only easy to make but also a delightful way to celebrate Halloween with friends and family. They offer a perfect mix of creativity and deliciousness, guaranteeing smiles all around. Whether you’re hosting a party or looking to indulge in some festive fun, this treat is worth trying. Get ready to enjoy a chillingly good dessert that everyone will love!
PrintGraveyard Mini Dirt Cakes

These spooky mini desserts combine creamy chocolate pudding, crushed cookies, and festive decorations, perfect for Halloween gatherings.
- Prep Time: 20 minutes
- Cook Time: 0 minutes
- Total Time: 20 minutes
- Yield: 6 servings
- Category: Dessert
- Method: No-Bake
- Cuisine: American
- Diet: Vegetarian
Ingredients
- 1 package chocolate pudding mix
- 2 cups milk
- 1 package chocolate sandwich cookies (such as Oreos)
- Gummy worms
- Halloween-themed decorations (such as candy or tombstone candies)
- Whipped cream (optional)
Instructions
- Prepare the pudding: Mix the chocolate pudding mix with 2 cups of milk according to the package instructions and whisk until combined. Set in the fridge for about 5-10 minutes until thickened.
- Crush the cookies: Crush chocolate sandwich cookies into crumbs using a zip-top bag and rolling pin or a food processor.
- Layer the desserts: In cups or small bowls, layer chocolate pudding followed by cookie crumbs, repeating until the top.
- Decorate each mini cake with gummy worms and chosen Halloween decorations.
- Add whipped cream on top before serving if desired.
- Serve and enjoy: Chill before serving to enhance flavor.
Notes
Use cold milk for the pudding and consider using smaller cups for children’s portions.